Objects
3DS Mesh allows you to create a number of basic geometric shapes that you can use for basic modelling. This section will go through some of the different shapes you can create and the parameters you can provide to alter the shape.
General Geometry Creation Process
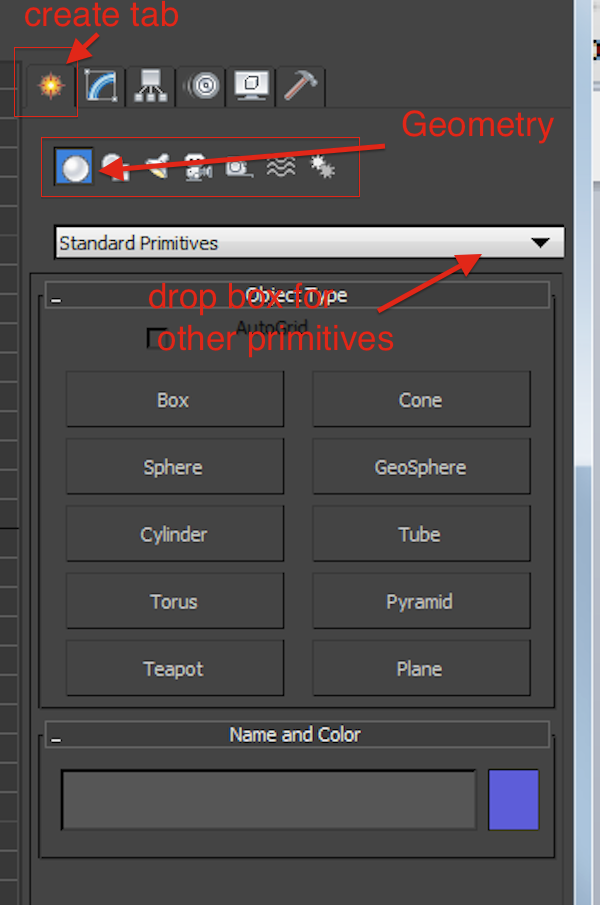
To create a geometric shape, you need to be in the create tab in the command panel and geometry radio button selected
The drop box further organizes the types of available geometry. You should go through this list to see what is available.

To select a particular piece of geometry click on the button for that geometry type.
Once you you do this, you can use your mouse to draw in any of the view ports.
This usually involves clicking and dragging to form the base of the shape.
Depending on the viewport you do this, in, your shape can be oriented differently. For example, to draw a plane on the x,y plane (flat like the ground) you can click drag in the top viewport or perspective view port. If you want the plane to be standing up, you can click-drag in the side or front viewport depending on which way you want the object to face.
Each object also has a name and colour. Do not worry about colour other than to help you identify the object. Our final model will have a material applied so the colour is irrelevant. For the name though, you should name each object you create. This is similar in idea to naming all your variables. It will help you find the thing you are creating in a large scene. If you don't change it your object will be named according to how it was created and a number (box001 for example). This would be like having variables named x1, x2,x3 in a program. Generally not a good idea.